Kitchen interiorResidential interior
Drywall installation & finishing · Eau Claire, Wisconsin
Your space.
Finished
beautifully.
Drywall installation, taping, finishing and textures for new construction and remodeling in Eau Claire and across the Chippewa Valley.
Eau Claire · Chippewa Falls · Menomonie
DRYWALL / SURFACE & FINISH
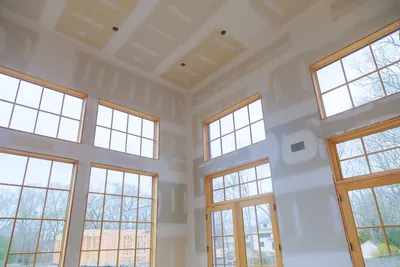 Surface detail
The work beneath the finished room.
Explore Drywall ServicesPHOENIX DRYWALL INC. / CHIPPEWA VALLEY
New construction & remodeling
Hanging/Taping/Finishing/Textures
01 / Drywall installation & finishing
The work behind
the finished room.
A clear scope starts with the space, the stage of construction and the finish you have in mind. Share plans, dimensions or useful photos so the work can be discussed.
- 01Drywall installation
- 02Taping & joint finishing
- 03Surface finishing & textures
- 04New construction & remodeling

Finishing in ProgressDRYWALL / PROCESS
Your next step
Tell us what
you are building.
Start with the project details.
Scope and scheduling are confirmed directly.
For homeowners & property owners
Working on
your home?
Tell us what needs work, where the project is and when you hope to start.
Tell Us About Your ProjectFor contractors & builders
Have a project
to price?
Share the requested scope, plans or specifications, and your bid deadline.
Send Project Information02 / Surfaces & finishes
Take a
closer look.
Light-filled interiors. Distinctive details.
Explore a selection of our project photographs.
Light-filled recreation roomInterior walls & ceilings
Curved wall & ceiling detailCustom drywall · Work in progress
From the first board to the finishing details.Explore All Photos
Light & material study
The finishing details,
in a different light.
A surface changes with the light. Explore smooth finishes and decorative drywall textures, then compare the details that give a room its character.
Explore a tone
Illustrative texture preview. Patterns, colors and layers are conceptual; confirm the actual finish with a physical sample.
SURFACE CLOSE-UP
Orange peel
Enlarged illustration · not to scale
ORANGE PEEL / ILLUSTRATIVE STUDY
01 / Drywall panelPaper-faced gypsum core02 / PreparationIllustrative finishing layer03 / Finished surfaceSelected texture & color
Orange peel, porcelain white. Finished surface. Light direction 50 percent.
A guide to drywall textures
Every surface has a character.
Texture sets the visual rhythm of a wall or ceiling. Use these common finishes as a starting point for your project conversation.
01 / CLEAN & QUIET
Smooth finish
No deliberate decorative texture. A restrained appearance that keeps attention on paint, proportions and architectural details.
In the light: Light along the wall can reveal small surface irregularities, making the preparation and paint finish especially important.
02 / FINE & PEBBLED
Orange peel
Closely spaced, small bumps create a lightly pebbled surface. The pattern can range from fine and subtle to more pronounced.
In the light: Small highlights and shadows reveal the grain. Compare pattern size and density on a sample.
03 / SOFT RELIEF
Knockdown
Raised texture is lightly flattened with a blade or trowel, leaving broader, flatter patches and shallow recesses.
In the light: Side lighting brings out the contrast between the flattened areas and the recesses.
04 / HAND-APPLIED CHARACTER
Skip trowel
Irregular troweled patches and openings create a varied, handcrafted appearance. Pattern and coverage depend on the technique.
In the light: Directional light emphasizes the changes in relief. Agree on a sample; the name alone does not define the result.
05 / DISTINCTIVE PATTERN
Stomp / brush texture
A texture brush leaves repeated impressions in wet material. The brush and technique can create branching or starburst-like patterns.
In the light: A more pronounced pattern casts more visible shadows. Check a sample under the planned ceiling and wall lighting.
THE FINISH STARTS WITH THE PLANBring the room.
Bring the room.
We’ll talk details.
Share a reference photo, the room’s lighting and any existing texture. Discuss the desired finish, preparation and project scope with Phoenix.
Discuss Your Drywall ProjectMatching an existing texture
Compare the pattern’s size, spacing and relief with the surrounding surface. A test area helps assess the blend; primer, paint and lighting also affect how the repair looks.
Smooth appearance. Appropriate preparation.
Smooth describes the look. Level 5 describes preparation: Level 4 finishing plus a skim coat across the full surface. Discuss it for demanding lighting or certain paint finishes; primer and paint are separate steps.
Compare physical samples in the room’s natural light and planned lighting. These illustrations explain common texture types; the finish, availability and scope are confirmed for each project.
03 / Supporting services
Complete
the finish.
Also offering painting and wood refinishing.
Explore the surfaces you want to refresh.

Painting
Interior and exterior painting, with attention to the surfaces you want to refresh.
Explore Painting
Wood Refinishing
Explore a new look for the wood surfaces you want to restore or refinish.
Explore Wood RefinishingA clear place to start
Let’s talk about
your project.
Start with the details. Scope and scheduling are confirmed directly before work begins.
01
Tell us what you need.
Share the project location, the work you have in mind and useful photos or plans.
02
Review the details.
Discuss the surfaces, finish expectations and information needed for an estimate.
03
Plan the work.
Confirm the scope and scheduling directly so the next step is clear.

Useful before you reach out
A few common questions.
What areas do you serve?
The current service area includes Eau Claire, Chippewa Falls and Menomonie. Include the project location in your inquiry so availability can be confirmed.
What should I include with an estimate request?
Start with your name, preferred way to be contacted, project location and the work you need. Photos help explain existing surfaces; plans and specifications help describe new construction.
Can I send plans for a construction project?
Use the contractor inquiry path and include your company, project information and bid deadline. The requested scope, plans and specifications help define the work to be reviewed.
How do I confirm timing?
Share when you hope to start and any fixed project deadlines. Scheduling is confirmed directly after the project details and scope have been reviewed.
What are you working on?
Share the location, the work you need and when you hope to start.